
In June, Mark and I undertook the massive task of converting our not-a-real-garage into a garage gym!
 Before: outside and in
"Not-a-real-garage" because it had no door and that opening isn't large enough to fit a car into, so it mostly became the repository for random stuff. (Obviously these before pictures are after it was cleaned out of junk.) We rent, and this structure was already here and wired, which was great because we didn't have to mess with that--only needed to get our landlord's permission!
The first step was to prep for a poured concrete floor. Since Mark has a contractor's license and this was his baby, he did most of the labor though I helped out when I could. It was his first time working with concrete but luckily, his father used to work as a mason so in addition to watching lots of This Old House videos, we had an expert who advised us on the prep and then helped out the day of the pour. Super win! We rented a plate compactor for the day to tamp down the dirt floor in preparation, and to press down some gravel that we used to level out the floor. Somehow we managed to fit it into the backseat of my Honda Civic--the rental guy was very impressed with that trick. Then Mark laid down the concrete mesh, which is just thick wire mesh that covers the floor to make the concrete stronger. (I was able to help a little with this part, ha.) Seeing as we had an opening in our structure and weren't pouring a closed off foundation, we had to place boards across the opening and shore them up with little props so the concrete wouldn't spill out on to the lawn.
We contracted a local company to deliver the concrete on a Saturday morning and the truck was HUGE! It's one thing to pass one on the highway and quite another to see one dominating your driveway:
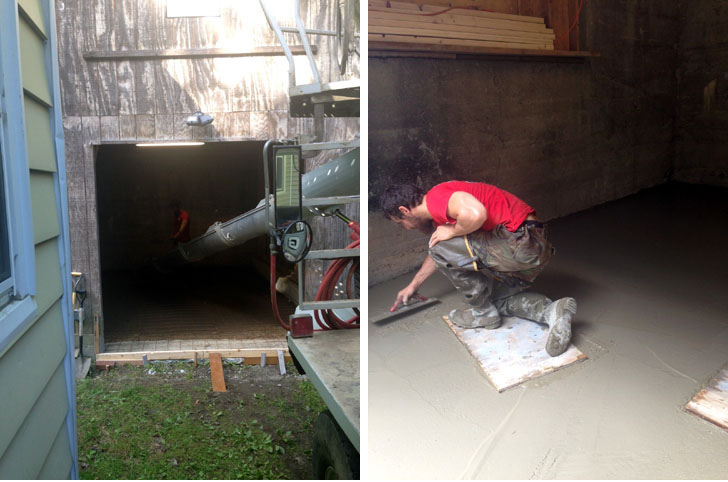 During: concrete delivery and Mark hand float finishing the surface
Once the concrete is poured and spread to all the areas you are covering, it comes time to float the surface! Floating=making the top nice and smooth, leveling and filling in any gaps, basically creating the look of the finished floor. (The concrete delivery guy had left by this point, they don't help with anything past dumping the concrete.) We rented a bull float, which kind of looks like a large metal Swiffer without a pad on it, LOL, but it was in poor condition and was messing up the surface rather than smoothing it. Mark's dad to the rescue! He showed us how you can finish it entirely by hand, using boards to kneel on to avoid sinking into the concrete, though we did have to wait a little bit after it was poured for the concrete to reach this stage to make the support possible. You can't wait too long to float the surface or the concrete becomes unworkable and the 'cream' (the moisture that rises to the top when you float it) is no longer present, and that's needed to smooth things over. Professional concrete contractors have power float machines which can get that super smooth and shiny finish seen in stores, but we weren't about to get into that so our floor isn't perfectly smooth (though entirely useable). Mark and I also put our handprints into one corner before the concrete dried :)
After the floor had cured for a few days, Mark began framing the opening so we could put in a door.
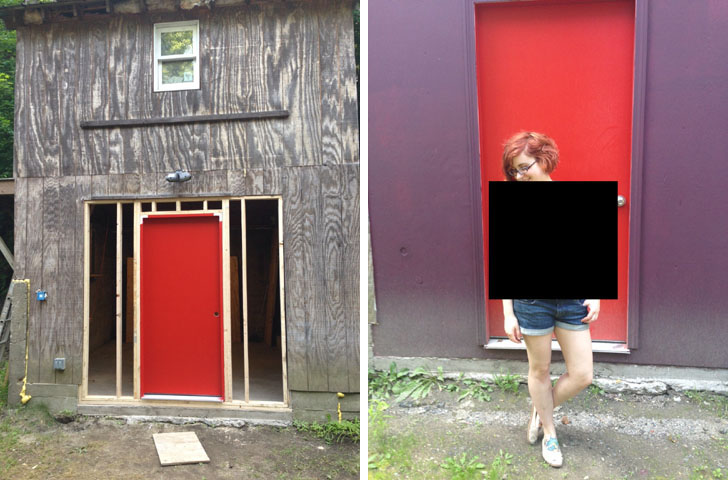 During/after: framing and the final outside (I'm wearing an unpublished sweater design, hence the censorship!)
We painted our door red because, why not? The wall we built to close the opening is painted brown, but it pulls more purple in some light which is why it looks purpe-ly above. Currently the rest of the structure is unpainted, though we'd like to paint the rest of it someday and add gutters, if we can come to an agreement with our landlord to reduce rent in exchange for those labors.
So what's inside?
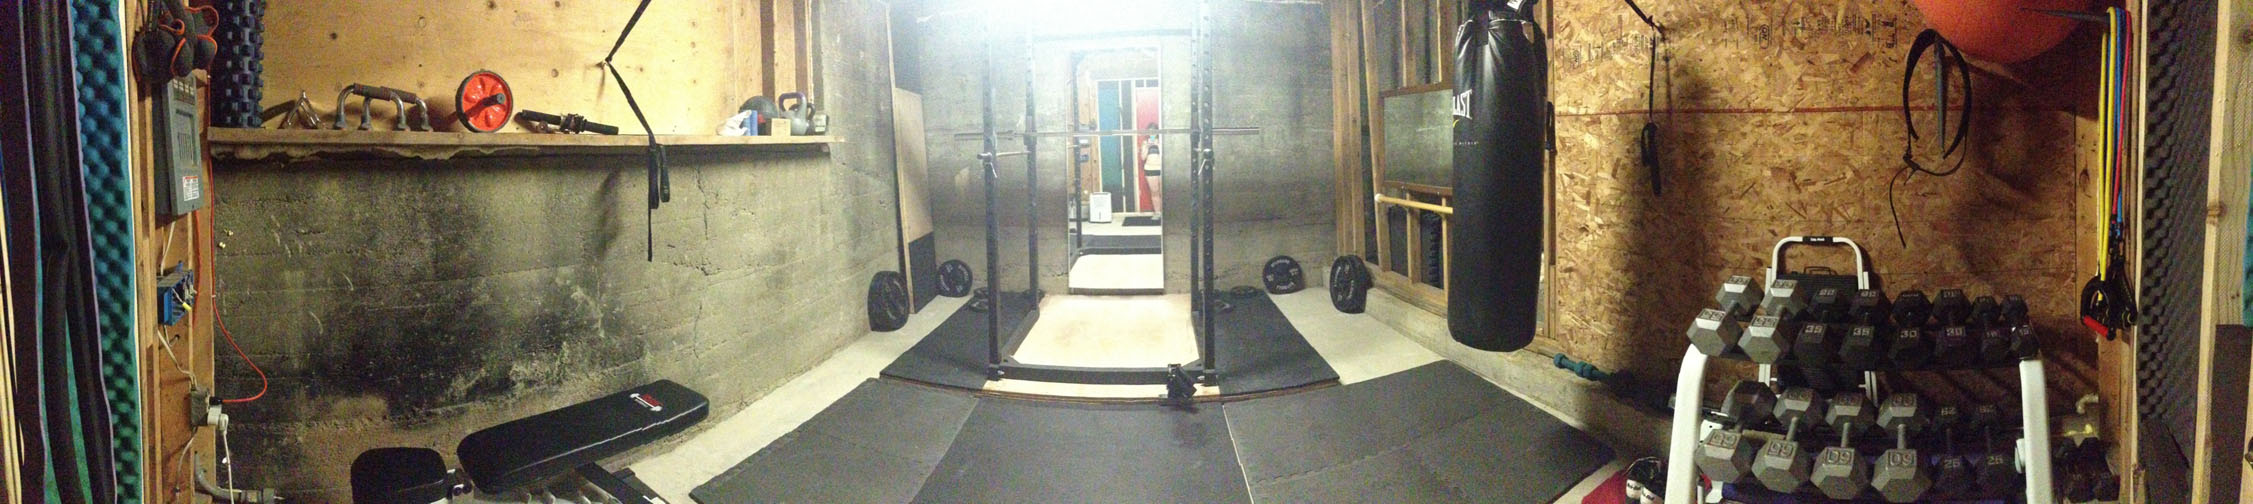 After: the finished inside!
All the workout goodies! We have:
- power rack with T-bar row attachment, on the lifting platform Mark built
- Olympic bar and 500 lbs of plates (that's including the bar's weight)
- adjustable weight bench
- two mirrors
- ballet barre for stretching
- heavy bag
- full set of dumbbells and 2 kettlebells, ab wheel, wrist/ankle weights
- exercise ball, pull-up bands and resistance bands
- yoga mats and blocks
- two pull-up bars (one is part of the rack, the other is separate)
- gymnast rings
It's incredible to have this at our disposal 24/7, only a few feet from our house. Mark lifts almost daily, since he's currently following 5/3/1 (a powerlifting program). I use the gym more sporadically because I'm attending fabric and pole classes every week, but it's great to have the freedom to pop in when I want a quick workout or have the urge to try something new. Currently my favorite use of it is to do some short lifting sets, either squats or deadlifts, and then do pull-ups and aerial conditioning on the rings. I like to invert on them and cycle through different positions (split, pencil, pike) and lower myself down really slow. My goal is to be able to do skin the cat!
If you're local and want to workout with us...let's do it!