designing

The St. Bega Set

Earlier this month, I had two new designs released with The Fibre Company as part of their Autumn 2017 Collection: the St. Bega Mitts and the St. Bega Cowl.

St.-Bega-Mitts-3_medium2.jpg
St.-Bega-Cowl-7_medium2.jpg

Worked in their new Arranmore Light yarn, both pieces are simple and rely on knitted tuck accents to gently shape the fabric and add texture. The cowl features a column of tucks at one location, while the mitts sport their tucks on the top of the wrist.

DSC_0388.jpg

Aside from the knitted tucks, it's all relaxing Netflix knitting--stockinette worked in the round with 2x2 ribbed trim!

Summer Shawl Bundle

For the month of August, I am offering a Summer Shawl Bundle: 4 shawl patterns for $12!

Untitled design (5).png

All four patterns use fingering weight yarn, and are great options for stashbusting or cranking out one last sweet summer project. Clockwise from top left, they are:

Advice From a Caterpillar, a triangle shawlette with a ribbed and cabled stitch pattern. This is the smallest shawl of the bundle and requires the least yardage. Shown in Gynx Yarns Single Merino, it requires 400 yards and measures 39" x 15.5".

Klystron is an asymmetrical shawl knit on the bias in two colors. It's knit mostly in garter stitch, with brioche stripes, and you'll need to understand intarsia to knit this. Shown in Shalimar Yarns Aerie, it requires 700 yds (420 yds MC & 280 yds CC) and measures 72" x 21".

Papelillo is a lace pi-shawl, worked from the center outwards. The lace patterns are both written and charted. Shown in Dragonfly Fibers Pixie, it requires 950 yards and measures 34" in diameter.

San Drea Shawl is another asymmetrical shawl, this time with stripes, short rows, and a lace border. This one is definitely a good stashbuster! Shown in Manos del Uruguay Fino (MC) and Shibui Knits Staccato with Nylon (CC), it requires 850 yds MC and 110 (120, 130) yds of CC1 (CC2, CC3) and measures 80" x 24.5"

Which one would you knit first?

New Pattern Release: Klystron

Earlier this week I released my Klystron shawl pattern!

All photos by Lindsey Topham

All photos by Lindsey Topham

I wanted to play with color and texture in this pattern, so I combined garter stitch, brioche, and intarsia. This asymmetrical shawl is knit end-to-end. It uses intarsia to create a smaller accent panel of contrast color (the purple) which runs along side the main body of the shawl, while regular rows of brioche interrupt the garter stitch fabric. Shaping is worked at the ends of rows and on either side of the off-center spine, to separate out the two colors and to create an unbalanced arrow shape at the end after binding off:

The yarn is Shalimar Yarns Aerie, which is a gorgeous single-ply blend of merino, kid mohair, and silk. Thanks to the silk and mohair, the yarn has a subtle sheen and slight fuzz which really elevates plain garter stitch to the next level. 

Klystron is available for purchase on Ravelry for $5.

Examining Bottom Up Set-In Sleeve Construction

If you listened to Episode 49 of the SweetGeorgia Show and shared their befuddlement on my design Ribbons and how the upper body is constructed, this post is for you! 

Bottom up set-in sleeve sweaters are my absolute FAVORITE way to work sweaters in one piece, but with the popularity of top-down knitting this method seems to be unfamiliar to some. (Other designs of mine worked this way include Turners Falls Cardigan, Polonaise Cardigan, Cables 'n Cats, Kitsunetsuki Cardigan, and Praline Pullover. Can you tell this method is my absolute favorite?!) I like this method for a few reasons. As a designer, my brain groks it much more easily than top-down sweaters and I can write and grade these designs across multiple sizes without knitting them myself. (Ribbons was knit by one of my awesome sample knitters, Joni.) As a knitter, I like getting the big, boring chunks of knitting out of the way first by completing much of the body and sleeves before finishing with the more interesting yoke. And of course, you get the bonus of attractive, well-fitting sleeve caps that have the appearance of set-in sleeves without requiring any seaming!

My drawing skills aren't the best, so here's my attempt to better illustrate this construction method for you. 

To reach the point shown above, you'll knit the body from the bottom up until the body reaches the underarms. For a cardigan, the body is knit flat; for a pullover, the body is knit in the round. On the last row or round, you'll bind off or set aside some stitches located under the underarms. This is so you can seam or graft the underarms closed once the sweater is finished. After that, put the body aside and knit the sleeves in the round from the cuff until they reach the underarm as well. Like with the body, you'll be binding off or setting aside a few stitches where the underarm is located before continuing. You now have one body and two sleeves...time to combine them!

(I reused scrap paper so apologies for the text showing through a little!) This step is the most fiddly and it's helpful to use a longer circular needle at first to accommodate the large number of stitches all at once. From here on out, I'll be speaking as if you're knitting Ribbons (or a cardigan) as opposed to a pullover, but the only difference is knitting flat vs knitting in the round. Otherwise the concept is still the same.

The joining row is worked on the RS. You'll knit across the right front of the body until you reach the stitches that have been set aside for the underarm. At this location, you grab one of your sleeves and knit across all the sleeves stitches (excepting the sleeve stitches which have already been set aside for the underarm.) Once the sleeve stitches have been joined onto the same needle as your body, you continue to knit on the body on the other side of that underarm gap. Knit across the back until you reach the second underarm gap, then knit across the second sleeve stitches to join the second sleeve to the body. Continue knitting the body on the other side of the second underarm gap, and knit to the end of the row which will leave you on the left front of the cardigan. Your work should look like this now:

Arguably, you could try it on if you wanted to but it's not going to stay on due to a super wide neckline! Now we need to shape the yoke to create the look of set-in sleeves and to ensure the cardigan becomes you know, an actual wearable thing. That will stay on.

This is the part that confuses most people, since the directions can look like a mess of decreases. It helps to remember what the armhole and sleeve cap of a traditional seamed set-in sleeve look like, since we're going for the same effect. We're simply recreating it as a 3D shape, instead of working it in 2D and relying on seaming to transform it into a 3D item.

A shaped armhole (left) starts with a series of bind-offs followed by a section of more gradual decreases to create the curve needed to accommodate your shoulder movement. A set-in sleeve cap (right) is designed to match that armhole curve on the front and back armhole, so each side of the sleeve cap also begins with a series of bind-offs followed by decreases. You'll generally wind up doing more decreases on a sleeve cap than an armhole, since you're attempting to create a bell curve to ease the sleeve cap into the top of the armhole.

How does this translate into Ribbons? The instructions look something like this:

  1. Decreases are worked only on the body.
  2. Decreases are worked on both body and sleeves.
  3. Decreases are worked only on the sleeves.

The rate of these decreases depends on the design itself, the gauge, and the sizes offered, so these steps might not all be followed if enough decreases can be satisfactorily completed in another step. For example, my Turners Falls Cardigan is worked in bulky yarn and I went straight to Step 2 for the yoke decreases since I had far less stitches to work with and didn't need to perform decreases only on the body.

When all yoke shaping is complete, you wind up with:

  1. A small amount of sleeve stitches.
  2. Stitches on the fronts equaling the intended shoulder width.
  3. Stitches on the back divided into three zones: the back neck, and stitches on either side equaling the intended shoulder width. These side zones should contain the same number of stitches as the fronts.

You finish off by working 4 short row sections. The first shapes the right front shoulder while slowly eating up some sleeve stitches to create that rounded top of the sleeve cap. The second section shapes the back right shoulder and eats up the rest of the right sleeve stitches. You repeat this process for the left side, so you're left with equal sets of stitches on the front and back for each shoulder. Then you graft, 3 needle BO, or seam to join the shoulders, and graft or seam the underarms closed!

The end result?

A beautiful, wearable cardigan with flattering, well-shaped shoulders and sleeves!

Are you ready to conquer a bottom up set-in sleeve sweater now? Let me know if you enjoyed this post and want to see more technical content from me!

New Designs: Seismite & Ribbons

I know I hinted at less designs...but these were completed awhile ago! Such is the nature of the biz, us designers are always working months in advance so I'm not necessarily busy when releases finally come out.

First up is Seismite, a fun and free hat pattern I released earlier this month. If you'd like to snag this one, just sign up for my weekly newsletter to receive it.

Photo by Lindsey Topham

Photo by Lindsey Topham

I dyed the yarn myself under the tutelage of the Kangaroo Dyer and this project is perfect for it! It was my first attempt at dyeing a speckly yarn and while the speckles aren't as pronounced as the skeins I've seen from official dyers, I'm pleased with the watercolor effect I wound up with. I only used up half the skein, leaving me with enough yardage for a second Seismite or some fingerless mitts.

I also contributed a cardigan to SweetGeorgia Yarns' Spring with SweetGeorgia Vol. 2 collection for spring. Meet Ribbons!

Photo by SweetGeorgia Yarns

Photo by SweetGeorgia Yarns

This long stockinette cardigan features graduated stripes of eyelet texture along the hem and cuffs, allowing you to play with fun color combinations! The set-in sleeves are shaped with decreases since you work everything in one piece from the bottom-up, which means no seaming. It's a simple, easy-going silhouette that works with jeans or a dress. I wouldn't wear it with this dress, I was only taking a modeled photo to share with my sample knitter Joni!

On Designing Less & Knitting More

A few months ago, I made a conscious decision to take on less design work. As I get older I find I want more time to myself and I care less about growing my business. That's not to say I'm giving up on designing, but I've become more and more content to do this my way, at my pace, rather than worrying about what I need to do to become the next big thing. Working full time once again has forced me to face my limitations and accept them.

Back in 2012-2014, I was working full time and spending almost every night and all weekend knitting samples. If I wasn't going to finish something in time, I forced myself to stay up late knitting it. I passed on events and time with friends unless they were going to come over and hang around while I knit. I remember going back home to visit a friend from high school and I was working on the Heliopath Vest. I sat in the middle of a party knitting it while everyone else around me was doing shots. (I mean, I did some shots too...but I made myself complete a chunk of knitting first! No drunk deadline knitting allowed!)

Honestly, there were times in that era when I HATED knitting, despite how much work I was accomplishing and how hopeful I was for my burgeoning design career. I told myself I had to stay on the grind and the next release would be it, I would reach the next level of exposure....then it was oh well next year it will happen....then it was if only I had more time to work on my business... 

Since then I've slowly gravitated towards using sample knitters, which has been a huge boon on my productivity and my sanity levels. I love my sample knitters! But even when I first started to use sample knitters, I was still taking on too much work. I have some designs I'm not proud of, because I know I could have perfected them if I had more time and wasn't as overburdened. I hate that I have work in my portfolio that makes me feel that way, and I want to avoid that from happening.

I've been talking a long time about slowing down and working less and finally, I feel like I've put that into practice. I'm relying on my awesome sample knitters to help me out for those third-party submissions that really speak to me but otherwise, I'm sitting those submission calls out. The FOMO is hard, really hard! But instead of working on 5 designs at once, I'm working on 2 or 3 and only knitting actually one of those, and there are plenty of stretches where that one design is the only thing on my plate. It's leaving me plenty of time to focus on other things in life that matter to me: spending time with my honey, exercising, cooking new things, and oh yeah--selfish knitting!

So I guess the point of this is...2017 might look different here. More FOs, and less releases. I'm ok with that though.

My two current selfish WIPs

My two current selfish WIPs

2016 Retrospective

I'm back from my self-imposed 'winter vacation' (reduced social media presence and less design knitting), which was great! I really enjoyed the extra time to relax, work on some personal projects, and play Rise of the Tomb Raider. I know, I'm behind in my video game releases. I don't even try to play things right when they come out, I just get to them when I get to them! Like Fallout 4, which I still haven't finished... Any gamers in the audience, by the way? Comment and tell me your faves!

Ok, back to knitting which is what most of you are here for! At the beginning of 2016, I was working part-time in order to devote more time to my design business in hopes of growing it. Then I was offered a promotion to a full-time position and I decided to take it, which threw quite the wrench in my business plans for the year. Ultimately, I'm really satisfied to be back in the workforce and I'm proud of what I was able to accomplish this year as a nights-and-weekends-only designer.

  • I released 11 self-published designs and saw 11 designs released from third parties for a grand total of 22 new designs!

Self published designs:

Third party designs: 

  • I ran another successful Instagram KAL in conjunction with Spun Right Round in the fall.
  • I started my weekly newsletter.
  • I grew my Instagram following to 1k.
  • I hired Knit Fitch to design my beautiful new logo & brand package.
  • And I came up with some great creative content this year, like EmSweWeMo and hosting my first ever sweater auction for charity.

I have a bad habit of never feeling like I am doing enough, but looking back at 2016: I did enough. I did MORE than enough.

What are you hoping to see from me in 2017? I have some ideas up my sleeve, but I'm also open to suggestion! 

Playing with Color: Polonaise Cardigan

Welcome to another edition of Playing with Color! Today we'll take a look at the Polonaise Cardigan. Let's just start by saying TGFM--thank god for Malabrigo! Or actually, thank god for Malabrigo's well-designed website that often puts perfect color combinations right next to each other. I mean, check out the page for Silky Merino. Hnnnngggghhh!

Photo by Kate Broderick

You'll need to pick three colors for this baby: one main color, and two coordinating colors for the bow detail. The idea is to pick two similar shades for the bow, one light and one dark, to be the body of the bow and its shadows. This is another occasion where shopping in-person is SO helpful. Failing that, if you can somehow get your hands on a Malabrigo color card or if you know someone with an extensive Silky Merino stash who can provide input, you'll be much better served than going in blindly and guessing.

I used Spring Water for the MC and Tatami/Topaz for the bow, as I was going for a cloth-of-gold bow look and thought the Spring Water would provide nice contrast. Here are some other fun suggestions! The first color on the left is the body color and the other two would be the bow colors.

Cape Cod Grey, Camote & Coral for a fresh, modern take

Pollen, Raspberry & Jupiter for an unexpected hint of sweetness

Wisteria, Acorn & Redwood Bark for the sophisticate's closet

Do any of these color combinations inspire you?

Playing with Color: Dreamer's Braided Pullover

I know I know, it's July and you don't even want to THINK about touching a long-sleeve wool pullover. I'm sorry. (Not really.) You might not be ready to start knitting but why not start playing with color options for your future Dreamer's Braided Pullover? Spend the summer months picking out colors and then begin knitting once fall hits! This design was originally published by Valley Yarns in their Sheffield, which is discontinued, so I was given the rights back to publish it myself and I reknit it in Cascade 220. As such, we already have two color combinations of this sweater floating around. I'm going to focus on options in Cascade 220 since it's such a versatile and affordable yarn. For the sample, I chose a palette of grey and aqua/teal leaning blues.

IMG_6545smallestPhoto by Lindsey Topham

One of my favorite things about 220 is the mix of solids and heathers in the color range. Just like mixing in a warm color with cooler ones adds dimension and visual interest, mixing solids and heathers can really spice up the look of your color palette.

You've got lots of options to tackle color for a sweater like this! In all the pairings shown, the center color is the main body color of the sweater. You can choose either accent color to be used for the corrugated ribbing in the hem and cuffs, though in my sample I used the darker color. Of course, you could always work plain ribbing in the MC and have the colorwork be contained only in the yoke of the sweater. (All photos below from Webs.)

Option 1: Neutral MC, two different pops for the CCs

2425 8013 9341From L to R: 2425 Provence, 8013 Walnut Heather, 9341 Garnet Heather

Option 2: Neutral MC, two tonal coordinates for the CCs (same approach as the sample sweater)

9641 8010 7807From L to R: 9641 Purple Tourmaline, 8010 Natural, 7807 Regal

Option 3: Non-neutral MC, two tonal neutrals for the CCs

8686 2429 8012From L to R: 8686 Brown, 2429 Irelande, 8012 Doeskin Heather

For the sake of covering all our bases and bringing these options back to full circle...

Option 4: Non-neutral MC, two different pops for the CCs--this one's for the adventurous!

7824 9452 8886From L to R: 7824 Burnt Orange, 9452 Summer Sky Heather, 8886 Italian Plum

Luckily, there are a ton of colorwork sweater patterns out there, so you can always browse other people's projects on Ravelry and get inspired by their choices! My favorite method is to head to my LYS and start playing with the skeins on the shelves. I always come up with new and unexpected combinations that way and it continually surprises me to see what works together.

Let Them Knit Cake

At the end of April I released Let Them Knit Cake, a Marie Antoinette inspired pattern collection as part of the Malabrigo Freelance Pattern Project!

cover
cover

From the introduction of the ebook:

"Let Them Knit Cake is a pattern collection exploring the intersection of history and fashion viewed through my personal lens as a knitwear designer, a source of inspiration I’ve begun to explore recently. Here I turn my focus to Marie Antoinette, the iconic French queen who is remembered by the public at large for her beauty, glamorous style and perceived superficiality. I’ve interpreted rococo fashion for the modern knitter by examining portraits of Marie in addition to reading accounts of her sartorial choices.

The phrase “let them eat cake” has been falsely attributed to Marie; while an agreed upon fallacy in the academic community, pop culture holds tight to the wrongful association regardless. So as a historian-cum-knitting designer, why not use it as the basis for this collection’s title? I wanted to play upon our familiarity of the phrase and make a reference to the usage of the terms ‘cake’ and ‘frosting’ in the sewing community. ‘Cake’ refers to basic foundation garments in one’s wardrobe (plain tanks, versatile jeans), and ‘frosting’ means fun, maybe frivolous clothing (party dresses, maribou trimmed nighties). The four pieces shown in this collection appear to be frosting on the surface—due in no small part to the saturated and exhilarating colors of Malabrigo Yarn—but I hope that they will take the place of cake in your handknit wardrobe, as essential pieces you wear day after day."

Let's take a closer look at each piece, shall we?

DSC01018
DSC01018

The Polonaise Cardigan, shown in Malabrigo Silky Merino in size 36", is knitted bottom up in one piece starting with a wee lace hem. No shaping in the body, but a small pleat on the upper back (in addition to armhole shaping) helps narrow the silhouette through the bust. I worked the bow with a combination of intarsia and stranded knitting, but you could easily work the whole bow in one color with intarsia, and use duplicate stitch to add the 'shadow' accents instead of stranding that color. After the body is complete, stitches are picked up around the armholes to work short row sleeve caps, and the neckline is finished with an I-cord edging.

DSC00924
DSC00924

The Coronation Tank, shown in Malabrigo Arroyo in size 34", is also worked from the bottom up in one piece. Large cables gradually shift from the center of the tank to the outer edges following princess seam lines as the stockinette center of the front expands. Waist shaping takes place on the back of the tank creating subtle corset lines, and a smaller cable detail decorates the chest. I love the versatility of tanks that can be layered as vests in the fall and winter, which is why I showed it here over a blouse.

DSC01067
DSC01067

The Fargeon Mitts, shown in Malabrigo Silky Merino in size S, are quick mitts that you can easily make using the leftovers from your Polonaise Cardigan. Knit from the bottom edge up, they feature a ruffled edging that transitions into a wide ribbed pattern and a thumb gusset.

DSC01097
DSC01097

The Dauphine's Stockings, shown in Malabrigo Sock in size M, are knit toe-up with a short row heel. The lace pattern on the tops of the feet continues up the shin and repeats on the back of the leg, but grows to accommodate leaf motifs for the calf shaping.

Since the goal of the collection was to do 'modern Marie Antoinette' and not 'recreation-level authentic costumes' I made sure to style them with modern clothing, though with a few nods to the original inspiration. Those shoes, for example--exactly what I had in mind and I nabbed them at the Salvation Army! What do you think? Would you be able to work these pieces into your current style?

You can find the patterns on Ravelry by following the links throughout this post. The Polonaise Cardigan and Coronation Tank are available for $7 each, the Fargeon Mitts and The Dauphine's Stockings for $5 each, and the ebook is available for $18.

Welcome Spring (and Galicia!)

Back in January Manos del Uruguay released their spring line of patterns. I contributed Galicia, a lightweight pullover, but it just felt wrong to taunt you with warm-weather goodness while still embroiled in the depths of winter! Well, the snow is (mostly) melted 'round these parts and I feel like it's finally time to turn our knitting attentions to greener pastures.

galiciaDressmaker's photos by Fairmount Fibers Ltd

Galicia is knit in Serena, a really nice alpaca and cotton blend which is smooth, drapey, and just perfect for lighterweight garments. I decided to try out a new construction method that I've knit before on personal garments but not designed in until now. You start by working the upper back flat from the neck down to the armholes, then those stitches are set aside and the front shoulders are picked up from your cast on edge so you can work the chest from the neckline down to the armholes. From there, the halves are joined and the body is worked downwards in the round. Stitches for the sleeves are picked up to work a short row sleeve cap before continuing knitting them downwards in the round. In a nutshell: seamless, knit flat AND in the round, and lots of fun!

Just like the Holla Back Tank (how I've come full circle!), the back steals the show here with a lace panel and garter stitch upper back section. The front has a slight A-line shape thanks to evenly placed increases, to keep the fit breezy and relaxing. Here you can see a close-up shot of the front in the official pattern photos, and a casual one of me that shows how it looks on a person.

galicia collage

I think it would look great in Natural paired with denim or patterned shorts, or maybe Green Tea--one of my favorite Serena shades! A short sleeved or sleeveless version would also be killer for the intrepid modders among us. Any which way they turn out, I can't wait to see more versions popping up.

Playing with Color: Stripe Quartet

Let's dive into another color-driven design, shall we? Stripe Quartet is a great simple, stripey cardigan using Baah Aspen. Mira (of Baah) and I picked out the colors together at TNNA last May and it was wonderful that we had similar thoughts. I'm super pumped she let me throw that orange in there because I love orange! There are two ways to approach a project like this, in my opinion. First is to use two neutrals and two color pops, which is what I did with my sample using two greys, hot pink and orange. There aren't many neutrals currently in the Aspen color line, so let's pick out a few different color pops that could be subbed in using the same greys as I did, Shadow and Grey Onyx.

coralreef sirenaClockwise: Shadow, Coral Reef, Grey Onyx, Sirena

I'm really digging that Coral Reef color! But how does it look with other 'pop' colors?

coralreef pecheClockwise: Shadow, Coral Reef, Grey Onyx, Peche

coralreef fuchsiaClockwise: Shadow, Coral Reef, Grey Onyx, Fuchsia

Sirena and Fuchsia are the more startling/weird color combinations with the Coral Reef but come on, I like weird! If you're going to do a four-color striped sweater I say have fun with it and go outside your comfort zone. :) Peche and Coral Reef is a tonal, more muted version of the original sample. Each of these combinations has a mix of warm and cool colors, which I think is important to consider when knitting multi-color designs. (Shadow, Grey Onyx and Sirena: Cool; Coral Reef and Peche: Warm; Fuchsia: Debateable.)

Another way to approach this project is by picking 4 shades in the same color family for a more gradient effect with less contrast. This option is dependent on your yarn of choice having lots of colors in the color family of your choice, and Aspen is somewhat limited here--you can't do an all-yellow Stripe Quartet, but not many dyers offer a multitude of yellows anyway!

bluetopaz sirena navy skyClockwise: Blue Topaz, Sirena, Navy, Sky

These four blues create a balanced pairing since the top row features warmer blues with turquoise/teal influences and the bottom two colors are straight blues, almost a little greyed out. A great example of warm/cool mix while staying in one color family.

amethyst fuchsia aubergine violetClockwise: Amethyst, Fuchsia, Aubergine, Violet

Another beautiful and subtle palette that combines warm and cool purples of all hues!

Which way do you prefer your stripes--funky and off-beat or tonally united?

An Open Letter to the Fiber Factor

Dear Fiber Factor, I was very excited to hear that you were coming back for a second season. I wanted to apply for the first season, but at the time was in the process of interviews for an exciting job (that didn't pan out, as luck would have it) and didn't want to risk the two events colliding. The second season is coming at a perfect time for my career, I thought. I am a better designer now. I can work faster. I have worked within specific frameworks to satisfy clients (yarn companies) which would serve as valuable practice for the challenges. So I waited, and I refreshed your website multiple times on multiple days until the official rules for Season 2 were posted.

Unfortunately, the new Fiber Factor is no longer advantageous to an indie designer. I realize that you are in this to make money (as Skacel), and you needed to adjust the process to create more revenue for yourself. It's a business and I get that. But I am also in business and I need contracts that respect my needs and my ability to make money. I saw that you responded to one knitter on Twitter who expressed dissent and asked her what she thought the contract for the winner should include. This is my perspective as a designer.

I think putting the challenge patterns on Ravelry is a great, fresh idea that helps the designers get more attention for their participation in the competition and helps you by catering to the wishes of the viewers. However, I feel that you have greatly underestimated and undervalued the time and effort it takes to prepare a pattern for purchase. Writing and grading a pattern alone takes hours, and that's before the knitting even starts. Then of course, you are requiring financial investment on the part of the designer by requesting that the contestants cover the costs of tech editing and photography (unless the contestant is already a skilled photographer and can photograph their own work, but not all of us are so lucky.) Tech editing and good photography are essential investments that drive pattern sales and help preserve a designer's reputation for quality patterns, so it's best not to skimp here. If you're not the one person to win $500 per challenge, you might be able to win $100 but depending on the rates one receives from their editor and photographer, that $100 might not result in any profit for the designer after those expenses. And we are doing this all for 20% of sales for the majority of 18 months? The only arrangement I currently know of where a designer agrees to 20% of sales is one of the digital revenue options with Interweave--and the designer has already received a flat fee for first publication rights AND can sell the pattern themselves at the same time as they receive the 20% of sales made through Interweave's digital store.

The grand prize for the winner of the competition is a $10,000 design contract which sounds generous until it's broken down. $500 per design, for 20 designs to be completed in 20 months. Now I have little issue with the first half of that statement, since $500 per design is in line with current fees for garment first publication rights and is more than is usually paid for accessories. (Though I assume you are keeping all rights in perpetuity, which is a slightly different game and thus worth more.) 20 designs in 20 months...is almost laughable and a little insulting. If I was able to work at that rate, I would probably already being doing so for myself wherein I keep 100% of the profits. Many of us are indie designers because we WANT to be indie! I'm not interested in working at that pace which is why I work for myself and not someone else. That timeline may be the norm for yarn companies' in-house designers, but those individuals are getting paid a full salary with benefits in return for producing large quantities of designs in a condensed timeline. $10,000 doesn't wind up staying $10,000 after self-employment taxes are paid, after all. Assuming the designer knits all of the 20 design samples themselves, they likely won't have much time to focus on producing for their own business in this time period. The alternate option is to hire sample knitters which cuts further into that $10,000.

Essentially, the competitors (and then the winner) will be putting their personal businesses on the backburner to enter this competition. Do you think your terms are worth that sacrifice? 9 months is a long period of time to not produce work; 29 months is even longer. The promise of exposure alone has no proven financial value, whereas indie designers have noted multiple times that more designs=more sales, new releases=more sales (of the new release and older work.) I can't imagine that seasoned indie designers--the type of talent you want in your competition, the type of talent that already has fans, an Internet presence and can create amazing designs--will be interested to enter. How many of the Season 1 contestants would be willing to accept these terms? I'd be interested to find out, wouldn't you?

Fiber Factor, I hope you can take this as constructive criticism and maybe think about how you can improve this season to make it equitable for all: designers, viewers and yourself. I trust that a better balance can be reached.

Respectfully,

Emma

Golden

The Spring 2015 issue of Knitscene will be out shortly and I have two contributions this time around. One is a fun article about warm-weather knitting projects and the other is the Gilt Sweater.

Gilt-Sweater_medium2All photos by Knitscene/Harper Point Photography

This was sparked by the 'golden' color story on the mood boards. As I've mentioned before, sometimes I have ideas that just come to me rather than being drawn from specific photos or references and this sweater was one of those lightbulb ideas. I wanted to create a relaxed layering sweater, a transitional piece that was cozy like a sweatshirt but a little more refined. Hence my working title--Luxe$hirt! I think I said to Amy in my proposal that 'the $ is like Ke$ha', ha. It also explains my seemingly random designer blurb at the end of the pattern. I've been having fun with writing those lately, and I at least laugh at myself even if no one else finds them funny!

comboThe most striking part about the sweater is the gradient color transition, made possible by two gorgeous colors of Malabrigo Lace held double. The bottom is two strands of Color A, the middle is one strand each of Color A & Color B, and the yoke is two strands of Color B. It created a super luxurious fabric that's warm without being heavy--like a golden cloud! Extra deep ribbing on the sleeves, a boxy cropped fit and the raglan sleeves are all meant to keep it casual and sweatshirt-like. The small lace detail at the collar is supposed to mimic old school sweatshirts with the triangle insert at the neckline.

Knitscene-Spring-2015-Golden-0068_medium2The styling and setting for these photos is super cute and I couldn't be happier!

Cats Cats Cats

As promised, the second sweater from the caboose photo shoot: Cables 'n Cats!

IMG_1215 (2)smPhotos by Lindsey Topham

This sweater has no particular inspiration, which is how I work sometimes. I was playing around with juxtaposing various cable and texture patterns together and fell upon this combination which I really liked. It's a classic, simple shape overall but very flattering thanks to the waist shaping and the large cables which sit at a princess seam orientation. And then you turn around to reveal....cat buttons!

IMG_1353smestThe sleeve cuffs are also buttoned and each button features a different kitty! I love this style of buttons--I used them in my Brooklyn Bridge Mitts, and I have robot buttons in my stash waiting for the perfect sweater.

blogThe construction is a little interesting towards the end, but nothing crazy complicated. The body is worked in the round until the armholes, then the sleeves are worked separately (also in the round) and joined together with the body to work the yoke in one piece....at first! Once stitches are bound off at the center back for the button placket, the yoke is worked back and forth in rows. Then as the neckline shaping begins, you work back and forth on one side of the body at a time (going from the front neck across the shoulder to the center back.)

You can snag Cables 'n Cats on Ravelry now for $7.00.

Let's Get Stripey

I recently released a new cardigan pattern....and never posted about it here. Oops! In case you missed it on Ravelry, this is Stripe Quartet!

IMG_1598smallestAll photos by Lindsey Topham

Knit in four colors of the gorgeous Baah Aspen, Stripe Quartet is a top-down raglan cardigan that lets the stripes take center stage. There are a few special touches, like eyelet raglan increases and a curved hem finished with an I-cord bind off.

blog

I was super excited to finally use this location! I am constantly making note of potential photoshoot locations and I had mentally bookmarked this one ages ago. These amazing blue cabooses reside just behind Green Valley Produce, a farm stand in Deerfield, MA. The owner Jon was nice enough to allow us to shoot there and I have another sweater coming soon that we took photos of here as well.

I'm a huge fan of orange and pairing it with hot pink and greys was a dream color palette for me. What quartet of colors would you get stripey with?

Armored

Now that the Winter issue of Knitscene is hitting newstands and mailboxes, let's take a look at my featured designer collection! Because oh yeah....if you didn't notice, I'm the featured designer of this issue. :) Yay! From the beginning I decided I wanted to design thematically as opposed to separate pieces--partially for that Project Runway, fashion designer type experience but also because it excited me to create a body of work meant to be shown together. I really like thinking thematically, it turns out, so I have several collections in the works for the future (aka, stay tuned!) The inspiration for this collection is medieval armor and the story of its inception is interesting. Last year I spent a lot of time online dating and as it was the first time in my life I was actively dating and not relationshipping, I purposely set the bar low in terms of who I would accept dates from in order to expose myself to as many different types of people and experiences as possible. I had my general standards, for sure, but I wanted to avoid falling into the trap of only dating my 'type' (men similar to those I had previous relationships with.) Anyways, I wound up accepting a date with a guy and we went to the Higgins Armory Museum, which is now closed so I'm glad I had a chance to see it then! We took a swordfighting workshop and looked at the collection, wherein I got really excited about all the details on the armor and took a bunch of pictures with the express purpose of turning them into designs and he probably thought I was a freak. (But that's okay because for reasons that had everything to do with him and nothing to do with my knitting freakiness, there was no second date.)

haubergeonAll fancy photos by Knitscene/Harper Point Photography, armory photos by me

The Haubergeon Sweater is most directly inspired by a specific piece I saw at the Higgins Armory, this suit of armor featuring a lattice-like pauldron (shoulder armor). I instantly saw a lattice cable pattern! I played with different shoulder placements of a cable design but threw some of them out the window for being too bulky, or for encroaching too much on the chest which I knew had the possibility of looking weird on someone with a larger bust than I. Ultimately I mashed up the idea of cabled arms/shoulders with the silhouette of a haubergeon (or hauberk), which is a chain mail shirt, giving this sweater its longer tunic length and the cropped sleeves.

gloves2

I played more fast and loose with the Gothic Gloves, historically speaking. They aren't directly linked to a specific style of armor, though I drew inspiration from more decorative, mixed-metal pieces and jousting gloves. The cuff shape is very recognizable as being medieval-ish and I approached the mixed metal aspect with two different colors, some stripes and a small colorwork motif. I want to thank Carina Spencer for her Sugar Maple pattern--knitting that piece, with its paired increases and decreases to form the pointed hem without increasing the overall number of stitches, helped me figure out how to shape the point of the cuffs and keep the stitch count consistent.

cuirassiers copyThe Cuirassier's Cardigan is another more artistic rendition, if you will. I saw several lovely cable-like details on suits of armor at the Higgins Armory and sought to create a simple, everyday cardigan with a few special touches. Something that was less Ren Faire than perhaps the gloves! As such, the only tie this piece has to armor are the flowing lines and small cables which grow out of an otherwise plain background. I-cord edgings are among my favorite because of how clean they are, and I felt that paired with a zipper closure instead of buttons, they helped keep this from looking too knitting-y (where a ribbed buttonband would have taken it away from the original intent.) I like the jacket/blazer feel of this piece, which was entirely unintentional!

greaves2And now, my absolute favorite piece of the collection: Ornate Greaves! Greaves (leg armor) could be quite plain but I followed in the footsteps of more decorative pairs with the kneecap cable design and purl ridges along the calves. This was extra special because I used my friend Laura's yarn, Gynx Yarns Merino DK. I love the above-the-knee length for these, partially because of my love for thigh high socks and stockings! Practically speaking though, it's a great choice for extra warmth and it gave me more space to play with the cable design.

In terms of yarn choice, I had two purposes. The first was to pick companies that represented something to me as a designer, and the second was to create a cohesive color story.

  • The Haubergeon Pullover is knit in The Fibre Company Organik, as I used another of their yarns for my first ever Knitscene pattern (the Mountain Nettle Shawl, in Acadia.)
  • The Gothic Gloves are knit in Brooklyn Tweed Loft, a company on my knitting bucket list to design for--maybe this will be the first step towards a future collaboration? ;)
  • The Cuirassier's Cardigan is knit in Valley Yarns Colrain, as a thank you to Webs and the Elkins. Without my job there I might not be a designer at all, let alone the one I am today with the friends, fans and industry connections I can directly attribute to Webs.
  • And the Ornate Greaves are in Gynx Yarns Merino DK, because Laura deserved to be in Knitscene for taking a chance on me in our multiple collaborations, and I wanted the world to be exposed to her beautiful yarn.

When I first envisioned the collection, grey was the color that popped to mind because duh, metal. While a monochromatic, all-grey collection would be really beautiful, I am first and foremost a person that loves color and I wanted to showcase something more 'me', and an all-grey palette would not be fitting. The gloves use a neutral oatmeal and a gold for a warmer play on the silver and gold of mixed metals, and the copper of the cardigan is to represent a different metal--the warmer half of the collection. On the cooler side, we have grey legwarmers because I HAD to have one grey piece and felt a neutral color was more wearable for an accessory like this. The pullover color is a bit of a reach, but I was looking for a cool, elegant color that fit with the rest of the palette rather than being a bright pop. Purple was a sought-after color in medieval Europe, after all!

My biggest goal for the collection was to draw inspiration from armor while creating modern and wearable pieces as opposed to costume items. Because of that, it's not a 100% historically accurate look at medieval armor but I am beyond pleased with the end result. What do you think--did I pull it off? Can you see yourself or someone you know wearing these pieces?

(Many thanks to Amy Palmer at Knitscene for accepting my proposal, the other folks at Knitscene for the fabulous styling of these garments, the yarn companies listed above for their excellent yarn support, and Robin Shroyer for writing a great article about me and for creating possibly the best interview ever!)

Participation

Let's talk about Kickstarter. Pledge a donation to the project of your choice, whether it be an indie dyer's studio start-up or the publishing of a book, and get sweet rewards in return. It's easier and more fun to participate as a donor when you get a taste of what your money is helping to support--fuzzy feelings only go so far! But there is a lot more to be garnered than just goodies. Crowdfunding is currently one of the best tools we can embrace as members of the fiber arts community. The rise of indie, DIY ethos in our industry has changed everything. We can pick out individual game changers, like Ysolda Teague who really championed the business model of the self-published designer, or Knitty and Ravelry who gave those designers easily accessible venues to showcase their work in. (But that's not the point, as wonderful as those three are!) We as a community embraced the tide of change and not only went with it, but encouraged it. We flocked to Knitty and Ravelry. We support indie designers without their own yarn lines, who aren't attached to distributors or publishing houses. In short, our little crafty environment is what it is now because of all of us. Burning Man has a principle of radical inclusion, where everyone is welcome. I see this principle in action on Twitter, in the booth of an up-and-coming dyer at TNNA, in the varied types of customers that come into Webs.

Obviously we're all creative people. We're crafters! Which is why I think we have (and should continue) to feel comfortable dictating the trends and terms of the industry. Crowdfunding allows us to all participate in the future of our community in a more direct way that buying an individual pattern or one skein of indie yarn, by supporting the projects we NEED to see come to life. I dearly love and enjoy the products that large yarn companies and well-known publishers put out, so this is not a diss to them. I simply believe that the more resources and ideas we have available as crafters, the better! If we limit our access, aren't we limiting our creativity?

So next time you see a great idea on Kickstarter, think of what our knitting world will be like with that idea--and what it would be like without it. Participate in some radical inclusion by donating for the ideas you truly believe in. I supported Doomsday Knits when it was first proposed, and I've recently contributed to Midwestern Knits (which is still funding!) Make a difference AND get some pretty yarn or something. Wins all around!

Balance

balance and progressFinally nailing my shoulder mount (left); handstand progressions & improving form (right)

So far, the best thing about my new gig is that I have time to enjoy being me. That includes extra pole sessions, late night Fallout 3 marathons, and the luxury of spending an afternoon reading--something I haven't done in years because of the guilt of not constantly forcing myself to be productive, to do something 'worthwhile.'

When I imagined my new life I thought I would be ten times more productive, because I assumed I would spend all my spare time knitting and doing the myriad assortment of related designer tasks (as I had done previously in every spare moment I had outside of work). More spare time=more work, right? Instead, I'm taking time to live...and my designing isn't suffering.

This is your regularly scheduled reminder to strive for balance. I'm a couple years late to the message though!

Free Pattern: Rainbow Slip Mitts

smileh
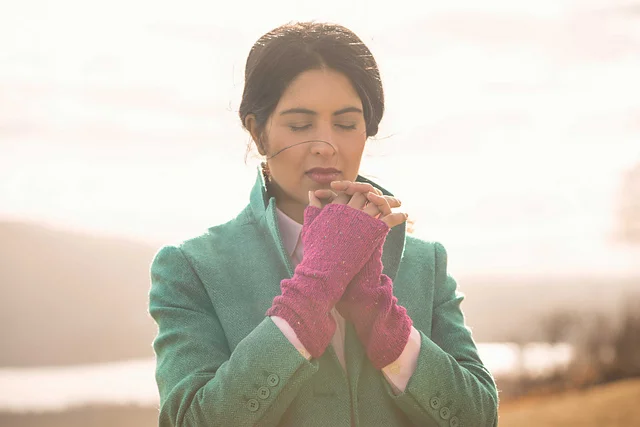
I have a free pattern for you today! These were inspired by some work I'm doing with my friend Gail, The Kangaroo Dyer. She put together these colorful mini skeins in her Poet Seat Fingering base--she calls it her 'first aid kit' for color--and gave me a batch to play with. I decided to put them to good use in this super easy pair of handwarmers! They are worked flat and seamed partially up the side to create an opening for the thumb. Rainbow Slip Mitts

Finished Size: 7" around, 4.75" long (17.80cm x 12cm)

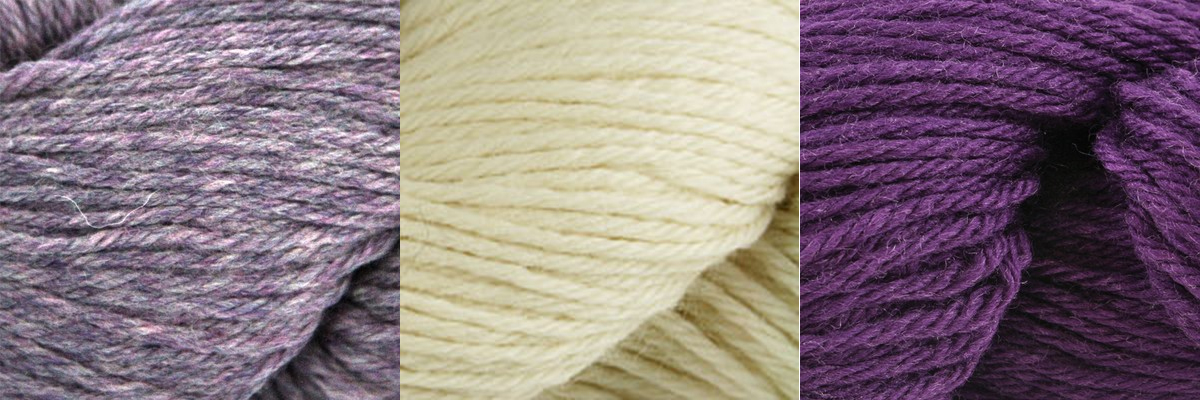
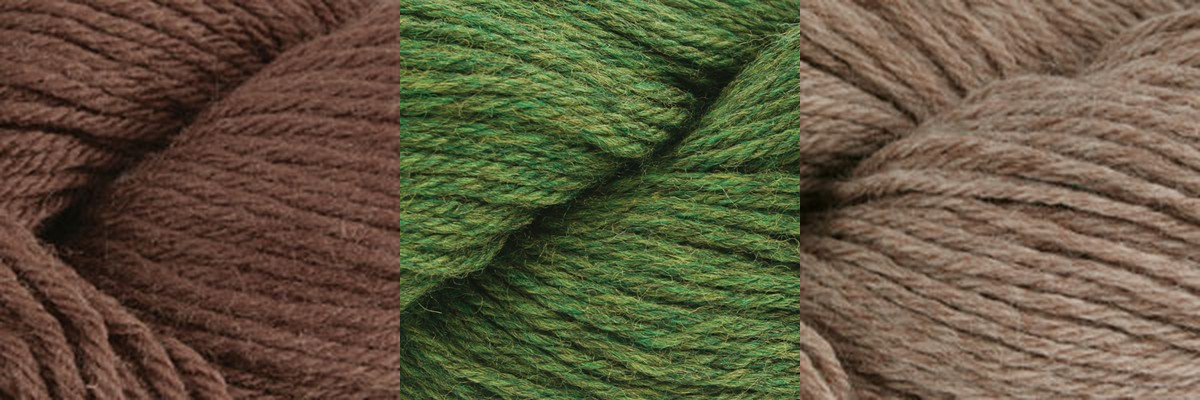
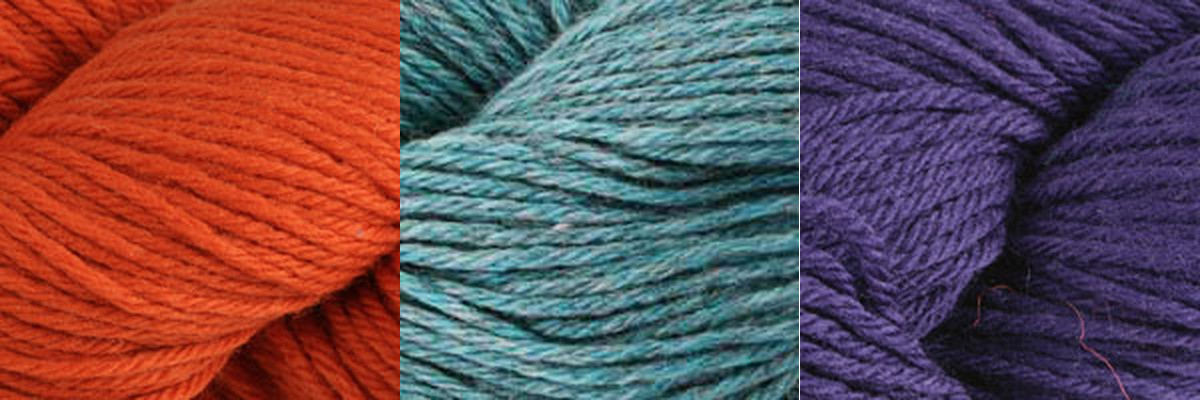
Yarn: approx 50 yards of natural and scrap amounts of 5 colors. I used RainCityKnits MCN Fingering in Natural, and a Kangaroo Dyer Poet Seat Fingering Mini Skein Kit. This is a great way to use up precious leftovers!

Materials: US 3 (3.25mm) needle, tapestry needle

Gauge: 30 sts by 38 rows = 4" (10cm) in rainbow slip pattern. Gauge is not crucial for this project.

Using natural, CO 49 sts leaving a long tail to seam with at the end. Row 1 (RS): Slip 1, *p1, k1; rep from * to end. Row 2 (WS): Slip 1, *k1, p1; rep from * to end. Repeat these 2 rows until work measures 1.5" from beginning. Knit 1 row, then purl 1 row. Begin rainbow slip pattern.

Switch to pink (or your first color). Row 1 (RS): K1, *slip 1, k1; rep from * to end. Row 2: Repeat the last row. Row 3: Knit. Row 4: Purl.

Switch to orange (or your next color). Row 5: K2, slip 1, *k1, slip 1; rep from * until 2 sts remain, k2. Row 6: P1, k1, *slip 1, k1; rep from * until 1 st remains, p1. Row 7: Knit. Row 8: Purl.

Switch to yellow. Row 9: K1, *slip 1, k1; rep from * to end. Row 10: Repeat the last row. Row 11: Knit. Row 12: Purl.

Switch to green. Row 13: K2, slip 1, *k1, slip 1; rep from * until 2 sts remain, k2. Row 14: P1, k1, *slip 1, k1; rep from * until 1 st remains, p1. Row 15: Knit. Row 16: Purl.

Switch to indigo. Row 17: K1, *slip 1, k1; rep from * to end. Row 18: Repeat the last row. Row 19: Knit. Row 20: Purl.

Switch to pink. Row 21: K2, slip 1, *k1, slip 1; rep from * until 2 sts remain, k2. Row 22: P1, k1, *slip 1, k1; rep from * until 1 st remains, p1. Row 23: Knit. Row 24: Purl.

Switch to orange. Row 25: K1, *slip 1, k1; rep from * to end. Row 26: Repeat the last row. Row 27: Knit. Row 28: Purl.

Switch to yellow. Row 29: K2, slip 1, *k1, slip 1; rep from * until 2 sts remain, k2. Row 30: P1, k1, *slip 1, k1; rep from * until 1 st remains, p1. Row 31: Knit. Row 32: Purl.

Switch to green. Row 33: K1, *slip 1, k1; rep from * to end. Row 34: Repeat the last row. Row 35: Knit. Row 36: Purl.

Switch to indigo. Row 37: K2, slip 1, *k1, slip 1; rep from * until 2 sts remain, k2. Row 38: P1, k1, *slip 1, k1; rep from * until 1 st remains, p1. Row 39: Knit. Row 40: Purl.

Switch back to natural. Knit one row. Row 1 (WS): Slip 1, *k1, p1; rep from * to end. Row 2 (RS): Slip 1, *p1, k1; rep from * to end. Repeat these two rows once more, then work 1 more WS row. On next RS row, BO all sts in pattern and leave a long tail to seam with.

Weave in ends. Using your tail from casting on, seam the bottom of the mitt 2" up the side. Use the tail from your BO to seam the top of the mitt 1" down the side. This will leave a 1.75" opening along the side for your thumb, but adjust the length and placement of side seams as needed to comfortably fit your hand. Repeat for the second mitt (they are identical.)

IMG_1776 editedHappy slip knitting!